BLM Spot Review: Camping at the Volcanic Tablelands Outside of Bishop, California

One of my favorite free camping spots this trip was at the Volcanic Tablelands, just outside of the adorable small town of Bishop, California. It was perfect for truck camping in my Tacoma.

Getting there:

You can access the Volcanic Tablelands by heading north on US 6 out of Bishop, and turning onto Casa Diablo Road. You’ll see a sign marking the area and lots of pull offs for camping.
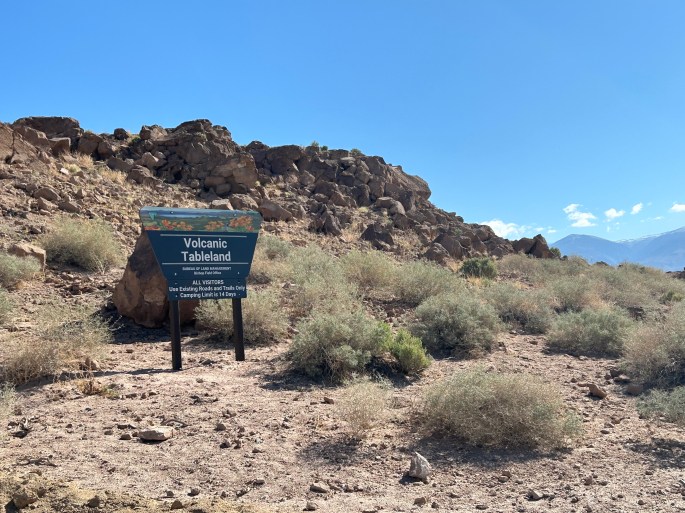
Entrance sign for Volcanic Tablelands BLM camping area near Bishop, California

You’re here!

camping at volcanic tablelands:

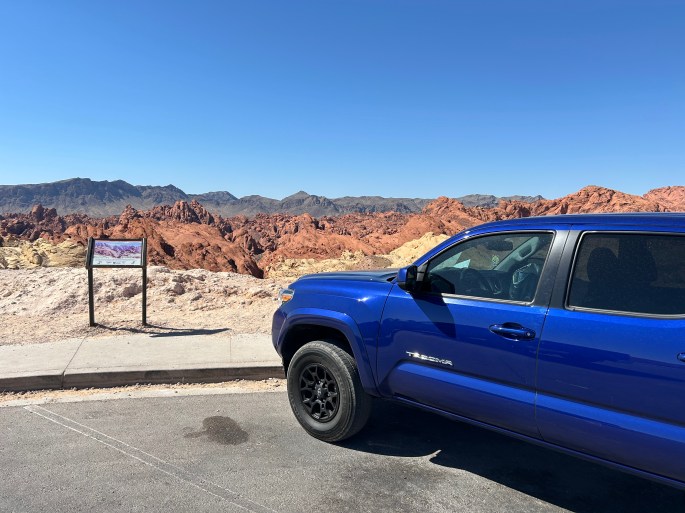
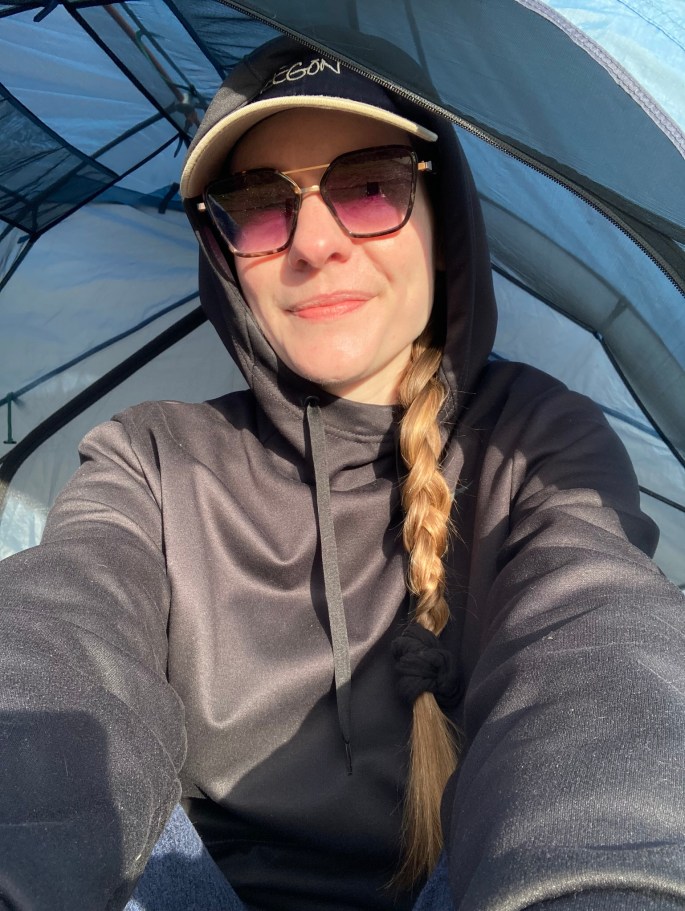
This was my first stop out of the Las Vegas area on my way to Oregon. The weather was perfect—sunny and cool, my favorite—and I had no problem finding the area, which is always a win when venturing into unknown BLM territory for camping. I’m always afraid I won’t find it! The pull offs are obvious and clearly marked with fire rings. I drove past a couple of RVs and found a nice, private open space to park the truck.

Toyota Tacoma truck camper parked on open BLM land with dog sniffing nearby at Volcanic Tablelands

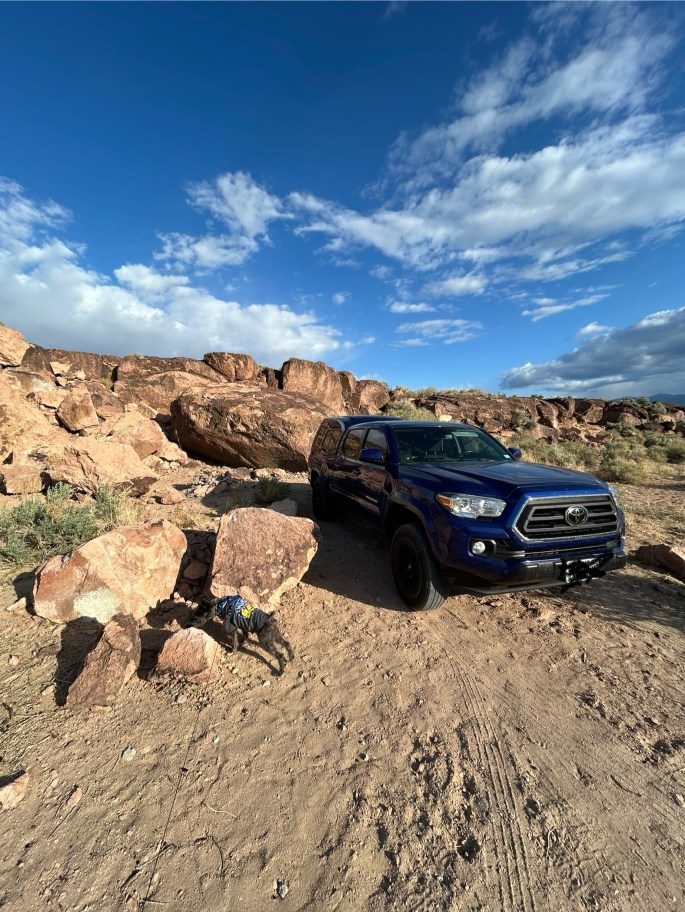
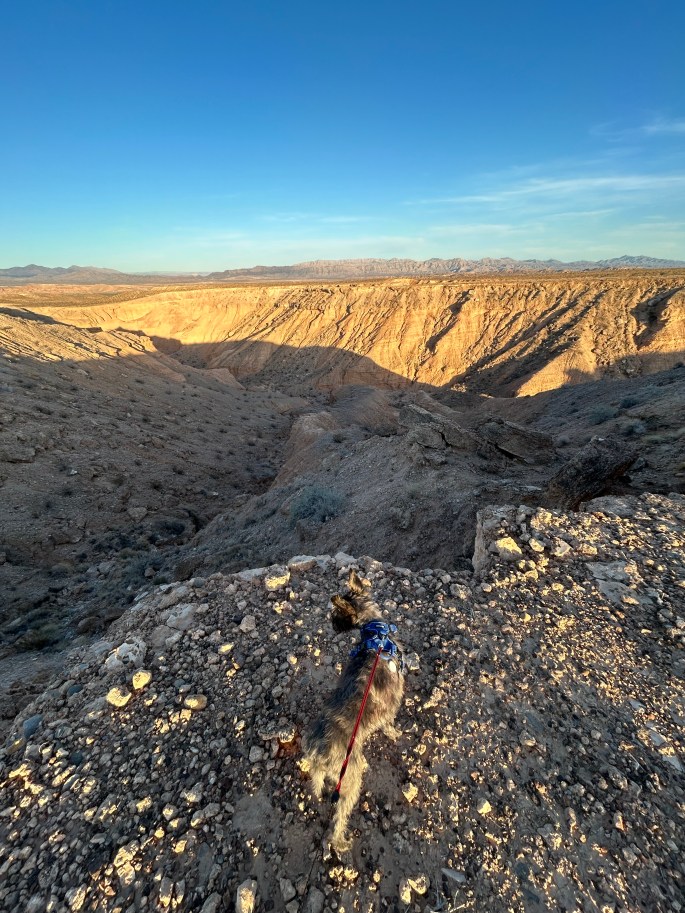
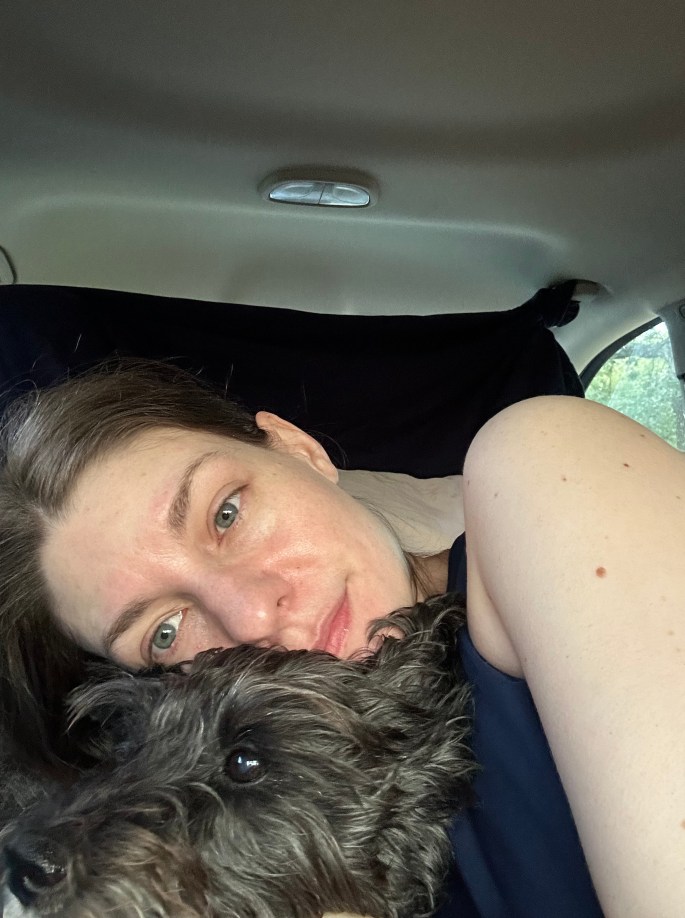
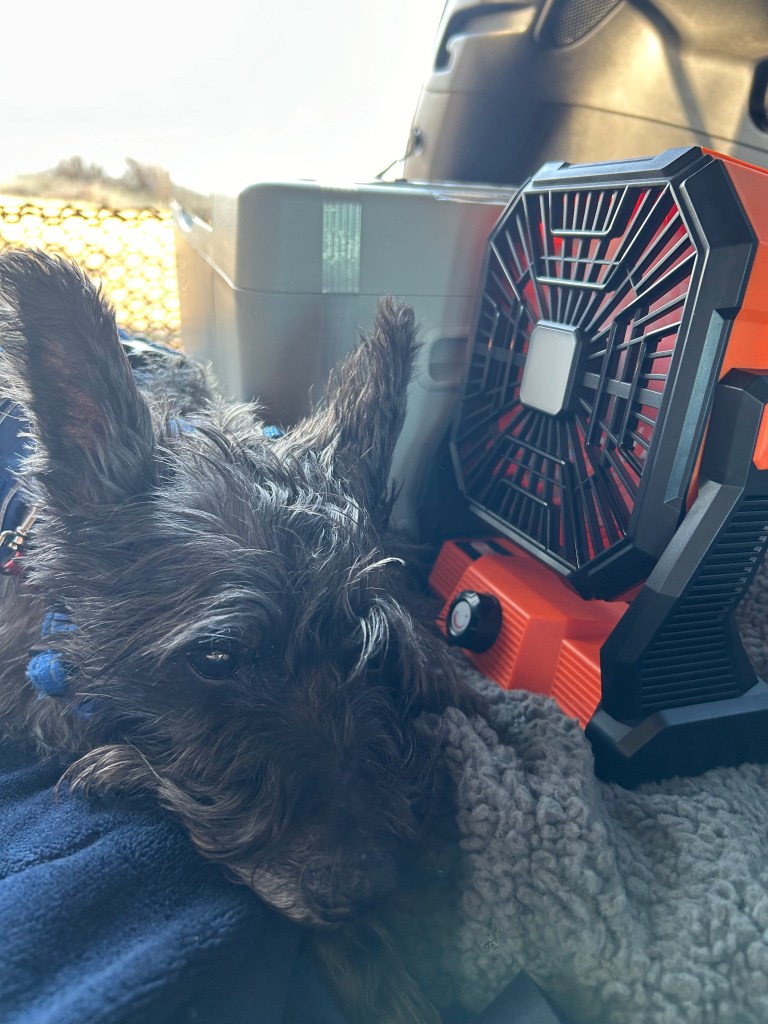
Beatrix got to work right away sniffing the area.

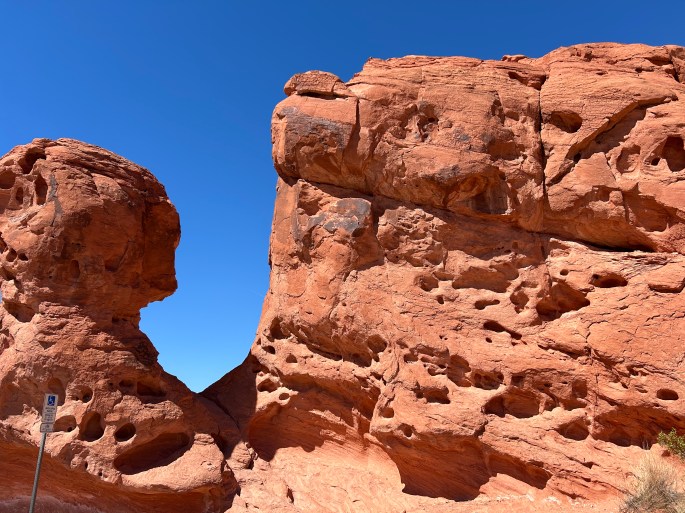
The view of the snow-capped eastern Sierra Nevada mountains combined with the rocky desert was nothing short of stunning.

Snow-capped Sierra Nevada mountains rising behind rocky desert landscape at Volcanic Tablelands

This view was like nothing I’d seen before!

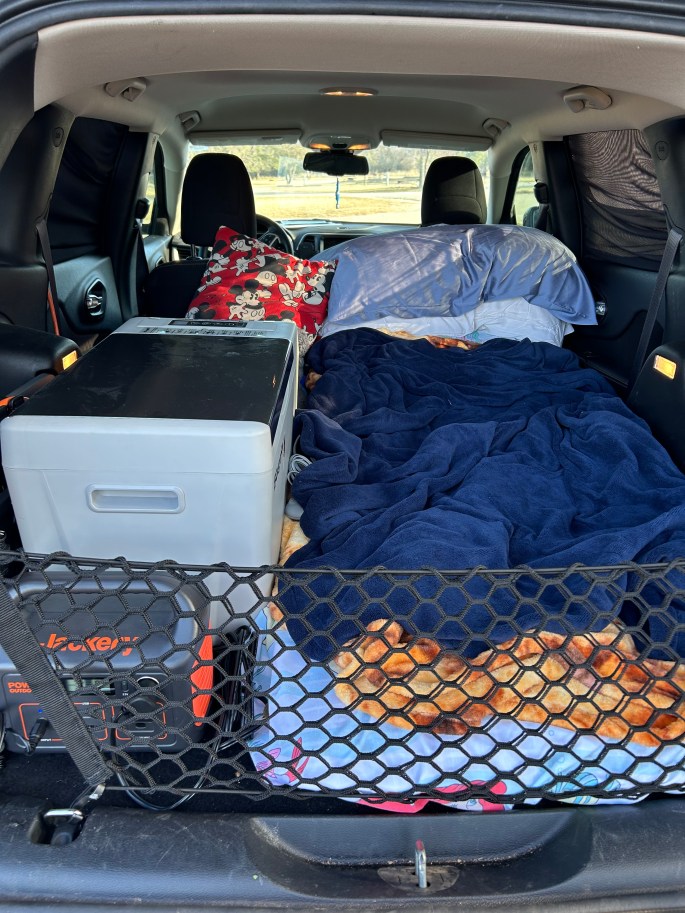
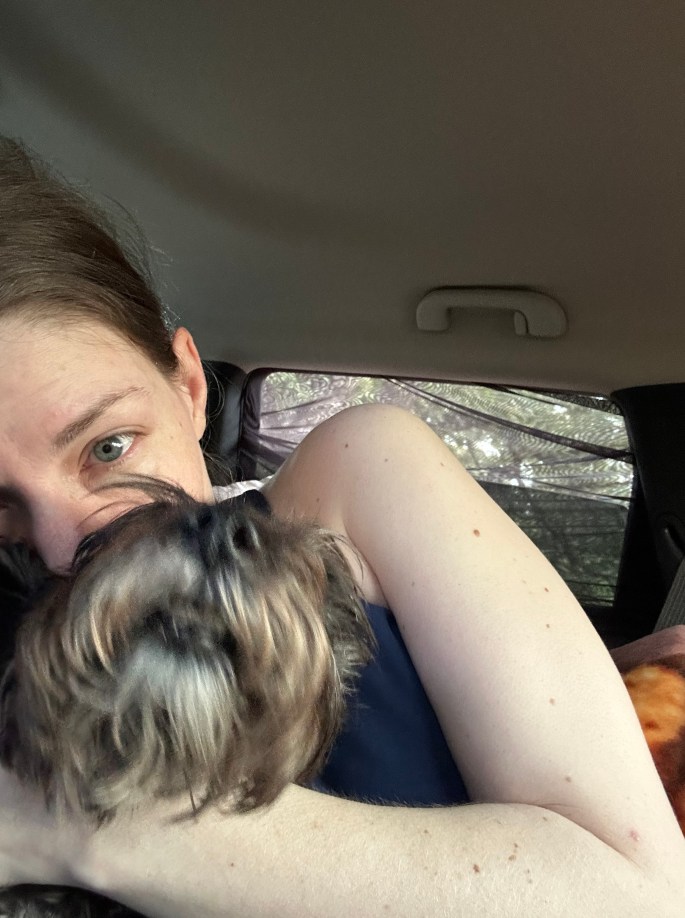
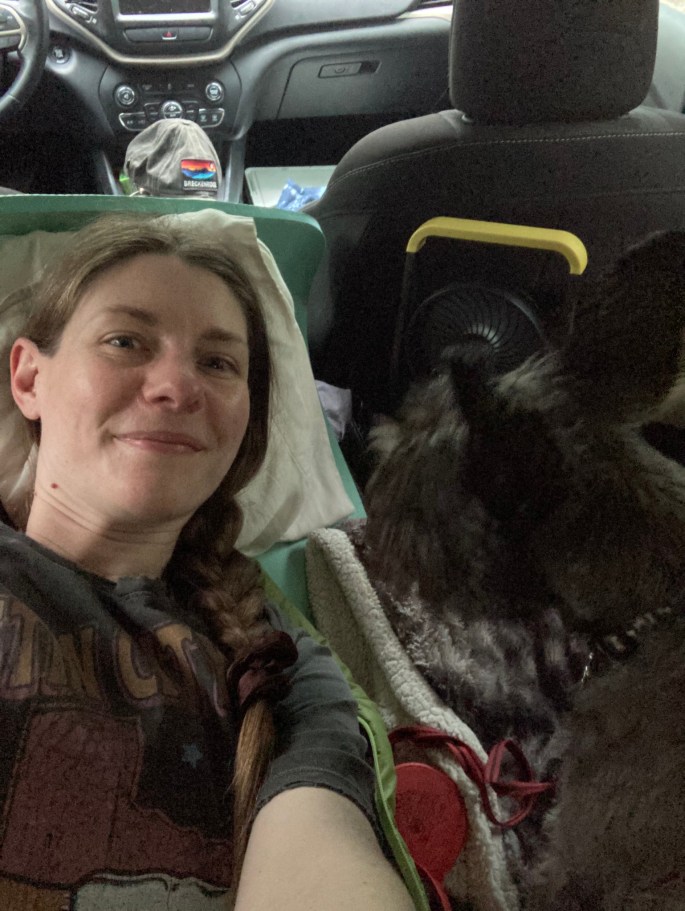
We settled in, made some dinner, and got a comfy night’s sleep in the camper.

Sunrise at Volcanic Tablelands BLM camping
Sunrise view of desert and mountains seen from inside a truck camper

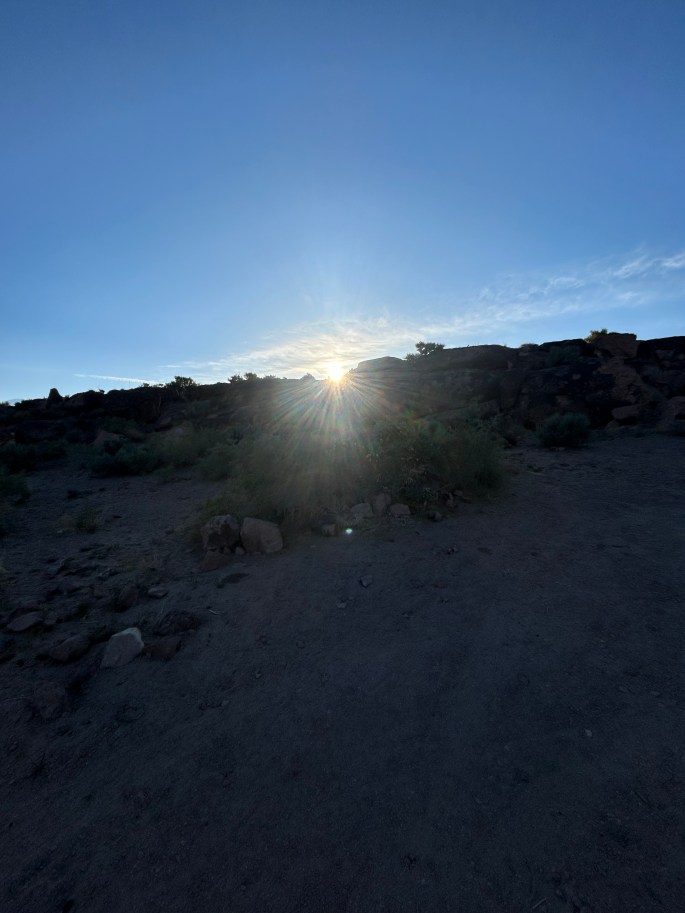
Yep, I woke up to this!

bishop, California:

In the morning, Beatrix and I walked a little, had breakfast, and prepared to get on the road. I decided to backtrack a little way to the town of Bishop, California to get gas and see if I could find a place to fill up my water jugs. Just like Poverty Flats (which I wrote about last week), this area doesn’t have any facilities like restrooms or water so you have to come prepared. I wasn’t out of water, but wanted to top off before getting back on the road.

Camper smiling in front of Eastern Sierra mountain range at Volcanic Tablelands BLM site

I could’ve easily spent more time in this gorgeous area. You can camp here for up to 14 days at a time!

Bishop is an adorable little town. Think, 25 mph main street. I stopped at the dog park to let Beatrix get some more sniff time in.

Sign for dog park in Bishop, California

There were plenty of smells to be found.

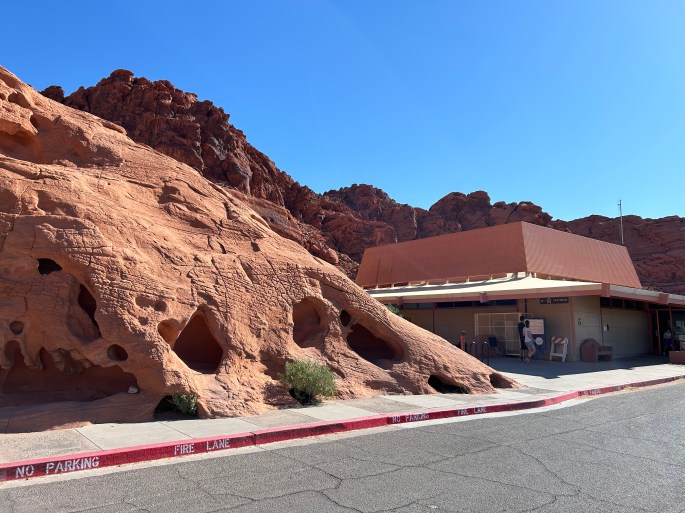
Near the dog park is a lovely park with a duck pond and public restrooms. I stopped at the visitor’s center to inquire about filling up my water jugs, and they kindly let me fill up right outside the building (pro tip: always ask if this is OK!)

Outdoor map display at Bishop, California visitor center

Visitor Center map.

After filling up with insanely priced California gas, I was on my way! I almost stopped at the famous Erick Schat’s Bakery, but I already had a car full of pastries from 85c Bakery in Vegas, so I decided against it. I don’t know what I was thinking, though…the more sweets the better! I’ll definitely stop in next time.

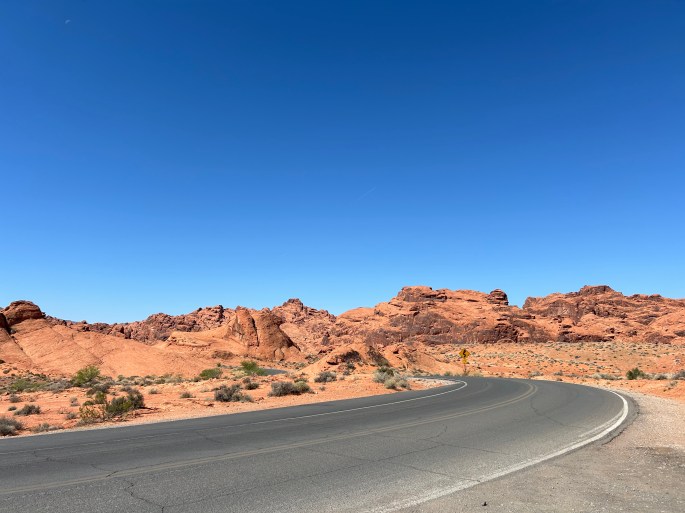
The beauty of the drive through this area can’t be overstated. We headed to the Reno area, driving past Mono Lake (a surreal, ancient lake) and then into Nevada. This route through the eastern Sierras contained probably my favorite scenery from the entire road trip.

Have you camped near Bishop? Did you try Erick Schat’s Bakery? Let me know in the comments!

First Time Dispersed Camping: Poverty Flats near Valley of Fire State Park

Previously on Just Get Outside, I was preparing for my next cross-country road trip and praying my Leer cap would come in on time. I stayed at some beautiful campgrounds along the way, and I’ll definitely share those soon, but let’s start with my first ever experience with dispersed camping at Poverty Flats outside of Las Vegas, Nevada!

Toyota Tacoma with camper setup parked on open BLM land at Poverty Flats near Valley of Fire State Park

Spoiler alert: my truck cap came in on time!

I was halfway through my trip from Texas to Oregon before I tried dispersed camping for the first time. I had great experiences at established campgrounds in Texas, New Mexico, and Arizona, but I was ready to push myself outside of my comfort zone a little bit. I knew I wanted to see the famous Valley of Fire State Park in Nevada, but they didn’t have any camp sites available in the park during the time I would be there, so I explored my options for dispersed camping.

Dispersed camping means free camping on public land that’s usually managed by the National Forest Service or the Bureau of Land Management (BLM). It’s a popular choice for boondockers, vanlifers, and road trippers looking to save money and enjoy some solitude. Some of the benefits of dispersed camping are that it’s free, and it’s usually much more private than being slotted into a campground just feet from your nearest RV neighbor. Some of the downsides are that it doesn’t have facilities like toilets and water, so you have to make sure you come prepared.

Poverty Flats is about an hour’s drive outside of Vegas and only about a 10 minute drive from Valley of Fire. The April weather was beautiful and it seemed like the perfect spot to try dispersed camping for the first time.

I arrived just before sunset and bounced slowly down the gravel roads, stoked to use my 4×4 for the first time. There were other campers and RVs set up, and I made my way past them to my own spot. I was a little nervous about knowing where I was actually allowed to camp, but there are tons of already established spots out there. You can usually tell when it’s an established spot because it has a fire ring and other indications people have camped there.

Toyota Tacoma with camper setup parked on open BLM land at Poverty Flats near Valley of Fire State Park

Settling in my home away from home!

I found a fire ring and got settled. I took Beatrix out for a stroll and marveled at the views. It was vast and open and I felt like I could see for miles. Even though we weren’t parked right next to anyone, knowing other campers were fairly close by made me feel at ease without losing that peaceful, wide-open feeling. I was out there for about 10 minutes when I realized dispersed camping would be my first choice over established campgrounds from now on.

Senior miniature schnauzer standing near cliff edge with desert views at Poverty Flats

You know I was hella stressed about her sniffing this close to the edge.

My favorite thing about camping is waking up to amazing views, and Poverty Flats definitely didn’t disappoint.

Desert landscape at sunrise viewed from inside a truck camper

What a way to wake up!

I couldn’t get over how cool the landscape was, and how much it felt like I had it all to myself.

desert views truck camping at Poverty Flats BLM land

I mean, can you believe this!?

After feeding and taking care of Beatrix, we got out of there and headed down the road to Valley of Fire State Park.

Valley of Fire, Nevada’s first state park, was established in 1934 and covers more than 40,000 acres of Jurassic-era red sandstone and ancient limestone mountains. The area was once covered by an inland sea, which makes the views cool and surreal. No reservations are needed to visit the park, but you do need one if you want to camp there. It’s pretty popular, so book your trip in advance. They didn’t have any camping availability on the random Tuesday I was there. It costs $15 to enter the park (or $10 if you’re a Nevada resident).

Exterior of Valley of Fire visitor center under clear blue sky

The visitor’s center has facilities you can use if you’ve been dispersed camping the night before without a bathroom! You can also fill your water bottle there.

This is a fantastic park to drive through. While it’s dog friendly (as long as your furry friend is leashed), you know how Beatrix rolls: riding shotgun with the air conditioning on, living her best senior dog life. We don’t get out and hike most of the time, because she’s a delicate little old lady, so parks with amazing views you can see from the car are totally her jam.

Driving through Valley of Fire State Park in Nevada

Seriously, it’s a gorgeous drive.

The park is full of desert bighorn sheep, which I was surprised to see are just chilling wherever!

Desert bighorn sheep grazing near the roadside in Valley of Fire State Park

All the cars slowed down to take a pic like this, these guys were unfazed.

I stopped at just about every place I could to take pics and enjoy the view. There were many shaded picnic areas that would be perfect for a break out of the sun for hikers and car travelers alike.

Toyota Tacoma at Fire Canyon in Valley of Fire State Park

Fire Canyon

Camper wearing Texas State Parks hat in front of Fire Canyon

Repping Texas State Parks with my hat, of course.

Valley of Fire has the most national park energy of any state park I’ve visited. Seriously, it’s stunning and otherworldly.

Seven Sisters rock formations

Seven Sisters rock formations.

At first I was disappointed that I wouldn’t be able to camp at the park, but staying at Poverty Flats and visiting the park in the morning was amazing. When I go back, I’m going to do the same thing again!

Have you ever tried dispersed camping? What was your first experience like? I’d love to hear your favorite free camping spots or Valley of Fire experiences in the comments!

Leer 122 Cap Defects – Defective Rear Door, Dents, and Replacement Woes

Having trouble with your Leer 122 truck cap? My first experience with a Leer 122 was a disaster: a rear door that wouldn’t open, dents in the body, and a loud popping sound every time I used it.

Here’s what happened and how I’m handling the replacement process of a defective Leer truck cap.

I purchased a new truck recently so I could take camping adventures with my dog Beatrix. The truck I ended up going with was actually my second online truck purchase…read about how I almost committed to the wrong truck here!

I chose my dream road trip vehicle based on a couple of factors, including reliability, maneuverability, and space. I decided the Toyota Tacoma was the perfect size for building out a comfy little mini-camper under a truck cap in the back.

Why I Chose the Leer 122 Cap

I chose the Leer 122 for several reasons. First and foremost was the height. After road-tripping and camping in my 2016 Jeep Cherokee, I learned something I really wanted was the ability to sit straight up in my camping space. There are a lot of truck caps out there, but the Leer 122 was the only one tall enough that would allow me to do so.

I decided to buy the cap new. It was a big investment, but since I was going to be camping in it, I wanted something in perfect condition. I went to my local dealer and ordered a brand new cap. Here’s a price breakdown:

Leer 122 base price: $3,276.00

Carpeted headliner: $215.00

12v power block: $200.00

Total with tax: $4,078.86

After going straight to the dealer and spending this much money, I never thought I’d have Leer truck cap quality issues!

Toyota Tacoma with Leer 122 cap installed
Toyota Tacoma with Leer 122 cap – rear view

As you can see, the Leer 122 cap looks amazing on my truck! The paint match was perfect, and I love the shape and style of the cap.

The Problems Started Immediately

Unfortunately, the problems started right away.

Everything seemed fine when I tested the cap at the dealer. But when I got home…barely 5 minutes away…the left lever wouldn’t budge on the lift-gate window. My 19-year-old son, my dad, and even Dave the handyman all tried, but no one could get it open. I quickly got in my truck and drove it back to the dealer.

To their credit, the dealer did the best they could. They made some adjustments to the way the cab was sitting on the truck, showed me the lever now opened as smooth as butter, and sent me back home. Unfortunately, it didn’t last. As soon as I got home, I tried to open it again, and the same thing happened: the left lever was stuck.

Perplexed, I went to the dealer yet again. They told me they would order another lever for me because the problem was this one was the wrong length. They affirmed that I would likely have trouble turning it up and down until I received a replacement.

I was crushed! I had waited four weeks for this cap, paid over $4,000, and it wasn’t right?! Once I got home, I realized with some gentle pushing and pulling on the lift-gate window, I could coax the lever open and access the back of my truck. It wasn’t perfect, and it certainly wasn’t safe or acceptable for camping, but at least I could use my truck for now.

About a week later, I received a call from the dealer telling me that Leer had shipped the wrong levers, and they were going to have to send an entire replacement lift-gate window. By this time, though, I had noticed even more problems with the cap.

Issues with the Rear Door, Structural Damage, and Other Defects

Damaged slot on left side of Leer 122 cap from defective lever

The damaged left side slot from the lever issues

First, I noticed that the slot the lever went into was extremely damaged. This was part of the whole cap, not the lift-gate window. I don’t know if the damage is what caused the lever to function improperly, or the improperly working lever damaged the slot, but either way, it was unacceptable. It was scraped up, and the piece on the back holding it in place was loose.

Scraped and damaged insulation tubing on Leer 122 cap

The damaged insulation/tubing

Second, I noticed that the tubing attached to the cap, to insulate the space where the lift-gate window closed, was damaged as well.

Bent and pinched metal on left side of Leer 122 cap rear door frame

The bent frame of the cap on the left side

Third, I noticed several bent or pinched spots in the actual body of the cap: on the left side of the door frame, the middle, and the right side. This kind of damage on a brand new cap was completely unacceptable.

The bent and pinched metal in the center and on the right side

I had also noticed that every time I opened the lift-gate window, it made a really loud “pop” sound!

What’s Next? Waiting for a Replacement

I spoke to the dealership again, and they were super understanding. They have been very helpful throughout this process, and agreed to petition Leer to send me a whole new cap. But…there would be a huge delay.

I would have to wait 4 to 6 weeks for a new cap, which meant I had to cancel my spring camping plans. Months of planning…down the drain. And after spending over $4,000, I expected better quality from Leer.

I had already passed the Jeep on to a family member, so I couldn’t even use it for camping. I know I still had the option of sleeping under the stars, but…I’m a comfort camper! Beatrix is a special needs dog and we need our comfy setup!

Dejected, I agreed to wait the 4 to 6 weeks for a replacement to come in. That’s where we are now. I don’t know what I’m going to do if the second cap comes in damaged like the first. I just have to trust the process and keep my fingers crossed that this time, Leer’s quality control is acceptable and I get a well made cap.

Now I’m just hoping the next cap is better than the first. Stay tuned and I’ll update you when the replacement arrives and let you know if Leer finally delivers the quality I expected from a $4,000 truck cap!

Have you had issues with a Leer 122 cap or other truck caps? I’d love to hear about it. Drop a comment below!

My No-Build Jeep Camping Setup: A Step-by-Step Guide

This post contains affiliate links. If you click on a link and make a purchase, I may earn a small commission at no extra cost to you. Thank you for your support!

My No-Build Jeep: Dependable and Fun
Just because I upgraded to a truck doesn’t mean you need a new vehicle to camp in comfort. For years, I made do with my trusty 2015 Jeep Cherokee, and with a few simple tweaks, you can turn almost any car into the perfect camping rig to live out your road-tripping dreams!
Beatrix and I have shared some amazing camping experiences in the Jeep. If it was up to me, I’d have kept the Jeep forever and just made it magically capable of holding more stuff. I loved the ease of folding the seats down and settling in with my dog curled up next to me as I lazed around at Texas State campgrounds, reading books and snacking the day away, just enjoying doing nothing.
This Jeep also took me over 5,000 miles the summer of 2024, across 6 states, through four national parks, and over endless miles of stunning scenery. It was reliable and comfortable, and I depended on it to keep me safe and happy. Almost any vehicle can be your perfect road trip rig if you keep an open mind.

Here’s a step by step guide to how I use my Jeep for camping.

Step 1: Create a Sleeping Space

By putting the seats down in the back I was able to create a sleeping space in my Jeep that was big enough for Beatrix and me. You’ll find a ton of info out there about building out sleeping platforms and things like that, and while I’ve done that for my truck to get some extra storage space beneath the bed, that’s not absolutely necessary for camping. Folding down your seats the old school way works just fine.

If your back seats don’t fold completely flat, you might need to fill the gaps for better support. I used plastic totes to create a level surface—and as a bonus, they double as storage!

No build Jeep sleeping setup
The whole setup with the back seats folded down

These plastic totes fill the space between the seats so my sleeping pad is supported all the way across. I store my electronics in the top tote. Why yes, that is a vintage Little Mermaid bed sheet pilfered from my family linen closet!

Check out my comfort camping post to find out more about how I chose my mattress pad.

Step 2: You’ve Got to Have More Power!

Power is essential to comfort camping. For trips at a powered state park site, I can rely 100% on this little Jackery battery. I plug an extension cord into the park’s shore power, and into the Jackery to power it, then I power everything else off of the Jackery. As you can see in the photo below, I have the extension cord plugged in to power the battery. The little fridge is charging off of the battery in the 12v spot. When I drive, I power the battery from the car, using the 12v connection in my trunk.

I just run the extension cord through my back window, which I leave open for airflow anyway, protected by a window screen (more info below).

Jackery powering no build Jeep setup

Here, the Jackery is being powered by shore power through the extension cord. While driving, I power it with the car through the 12v in the trunk, which you can see to the left. The fridge is plugged into the Jackery battery’s 12v spot.

Step 3: Figure Out Food Storage

Having a fridge really levels up your camping experience. It provides you with everything from cold drinks to leftovers you can simply transport and heat up over a small propane stove.

The number one reason I got a fridge was to transport Beatrix’s medicine, which has to be refrigerated. That’s why I’m so careful with making sure I have enough power all of the time, and why I usually choose powered campsites.

I’ve used this BougeRV fridge since last summer when we took our big cross-country road trip, and I love the little guy. It’s affordable and does a great job, and holds everything you need.

BougeRv fridge in no build Jeep setup

Getting my fridge packed up before my road trip last summer. As you can see, a whole oat milk and a giant bag of apples can fit in there, along with other snacks and my dog’s medication.

Step 4: Keep Safety and Privacy in Mind

You don’t anyone walking by to just be able to peer in at you, you know? I swear, one of the easiest ways to create a little privacy is by hanging a simple bed sheet. I have a navy top sheet that lives permanently with my camping supplies and comes on every car camping trip with me.

A simple bed sheet does the trick.

As you can see, I just tie a corner of it it to each of the little handles and pull it tight (What are those little handles called? As a kid we called them “oh sh*t bars” but somehow I doubt that’s the technical term).

As you can also see, it’s not totally perfect. You can still see partway in. If you want to stealth camp at a truck stop I recommend something a little more substantial than tying a sheet to the “oh sh*t bars.” But I feel perfectly comfortable camping at Texas State Parks like this. Plus, you want a little bit of moonlight to be able to come through or how else are you going to bask like a nature witch bathing in the moonlight?

Keeping your windows down a bit is essential for airflow when the weather is warm. In fact, cracking your windows a bit is also essential even when it’s cool, so you don’t wake up with condensation all over the place (did you know you breathe out a ton of water when you sleep?)

But you still want some privacy and you absolutely do NOT want any bug in the vicinity to just be able to fly on in, so window screens are the perfect solution.

Gosh Beatrix, can you just not look like a hostage in my window screen pic? Kthanks.

I use window screens like this. They have a stretchy part at the bottom and you just pull them over the door frame.

Step 5: Temperature Control

Temperature control is essential to your comfort. I tend to avoid temperatures below the upper 30s and above, like, 70 degrees F. I find it a little easier to stay warm in cooler temps than to stay cool when it’s hot.

No matter what the forecast says, it’s a great idea to bring along a fan. I use this little USB rechargeable fan and it can make it through almost two whole nights on one charge. If you have to camp in warmer temps, then fans, parking in the shade, and reflective sunshades can help keep things cooler.

I also swear by a heated blanket, like this one. When I’m at a site with shore power, I simply plug it in to my Jackery. Electric blankets draw a lot of power though, and even with the Jackery plugged in and drawing charge all night, I’ll notice using the blanket drains my Jackery to 60 or 70% by the morning. However, Beatrix loves it on a chilly night, so it’s worth it! I’ve heard that 12v blankets use less electricity, so if I end up trying one of those, I’ll let you know how it goes.

Could you see yourself camping in a setup like this? Or do you have your own tricks for turning a car into a comfy camper? Let me know in the comments—I’d love to hear what works for you!

Top 5 Comfort Camping Tips

This post contains affiliate links. If you click on a link and make a purchase, I may earn a small commission at no extra cost to you. Thank you for your support!

Think camping has to mean suffering? Think again. Comfort is the key to making any trip enjoyable—especially if you’re not into “roughing it.”

When I talk to people about my love of camping and being outdoors, I get some side-eye from people who know me well. The other day my dad was like, “you know, of all the people in this family, you’re the last one I would’ve guessed would be into hiking and camping.” And I totally get it! I’m not, like, a get-your-hands-dirty kind of person. I’m not into “roughing it” in any way, shape or form. I never really liked being outside and I’ve never been a big nature person until my late 30s.
A lot of that probably has to do with the fact that I grew up in Texas. While there is some beautiful landscape here, I grew up specifically in the land of concrete and highways. There’s practically no public land where I’m from. I was just never really exposed to nature until I got older and explored it on my own, mostly in places that weren’t Texas.

But that’s only part of it. Another thing I learned when I got older is, it’s actually possible to camp comfortably.

This is me camping uncomfortably. After one night of sleeping on the ground at Enchanted Rock in 2023, I swore I’d never do it again—and I meant it.

Once I learned a few tricks, I realized that camping didn’t have to be miserable. If you love the idea of camping but hate the thought of being uncomfortable, read on for my top 5 comfort camping tips:

1) Your car is way comfier than the ground.
Let’s be real—sleeping on the ground isn’t fun. Rocks, roots, uneven terrain… no thanks. Sleeping in your car gives you a flat, insulated, and secure space to get actual rest. If you’re curious how I turned my Jeep into a comfy mini camper, check out my no-build Jeep camping set up here!

2) A hard sleeping pad is almost as comfy as a real mattress.
Amazon has a ton of Japanese sleeping mat options, which are similar to futon mattresses. The specific one I have is no longer available, but there are some others, like this mattress, that look like they’d be great, too. These mats offer way more support than traditional camping pads or inflatable mattresses. At first, I tried sleeping on a yoga mat—big mistake. I felt everything. Yoga mats are good for yoga, not for sleeping in your car.

Yoga mat sleeping pad. I do not recommending if you’re a Princess-and-the-Pea type like me. I felt everything.


3) Sleeping bags are fine, but when the weather is mild, a bunch of soft blankets are the comfiest.
Unless you really need a sleeping bag rated for low and freezing temperatures, a bunch of blankets can be so much more comfortable. Especially if you’re like me and you toss and turn. Sleeping bags aren’t my favorite for that reason, so even when it’s chilly, I just pile on more blankies. You can adjust them easily as the temperature changes. If you’re not camping in freezing temps, you can skip the restrictive sleeping bag.

You can layer soft and comfy blankets like these and add and subtract them depending on your personal levels of comfort and the weather.


4) Bring TWO Pillows.

Just grab your own pillow off your bed. Better yet, grab two! There’s no reason to suffer.
If you don’t want to bring your inside bed pillows out into the wild, you can invest in some that are just for camping; but don’t skimp on quality!
Something like these comfy memory foam pillows will work perfectly.
I currently have these pillows on my bed and always take them camping with me. I just swap out the pillow cases for clean ones when I get back.

5) Not having access to a toilet doesn’t mean you have to pee on the ground.

One of the biggest concerns for new campers is where to go when there’s no toilet around. My favorite solution? A spill-proof female urinal. (Yep, “spill-proof” is key—trust me). There are a lot of options, but this female urinal is my favorite.

You can dump it outside if you’re way out in the bush, or if you’re at a campground and just don’t want to walk all the way to the bathrooms in the night, empty it into a toilet in the morning. Once you get home, you can clean out the container in the shower with some Dawn dish soap. Using vinegar also eliminates odors.

What are your essential comfort camping tips? Let me know in the comments!